How to add online giving to your Church Website
Online giving for churches has become important for almost all churches, as people prefer to take an automated approach to church donations. It’s become something we see a lot of requests for with users of our church themes for WordPress.
There is a plugin called Church Tithe WP which makes it very simple for all churches to accept online donations via credit card, and it includes recurring payments. It uses Stripe to process the payments and to automatically deposit the amount in your bank account. It’s free to install, and has pay-as-you-go pricing that maxes out at $199/year.
Setting it up
In this article, I’ll show you how to add an online giving page to your website if you use one of our church themes here at Mint Themes.
- Install the Church Tithe WP plugin by logging into your WordPress dashboard, and then clicking on “Plugins” > “Add New”.
- Search for “Church Tithe WP” and install + activate the plugin.
- Once activated, you’ll see “Church Tithe WP” in the left sidebar of your WordPress dashboard. Click on it, and follow the steps it provides to get the plugin set up with Stripe, which allows the payments to be deposited directly into your bank account.
- Now, we will create the page where giving can take place. Go to “Pages” > “Add New”.
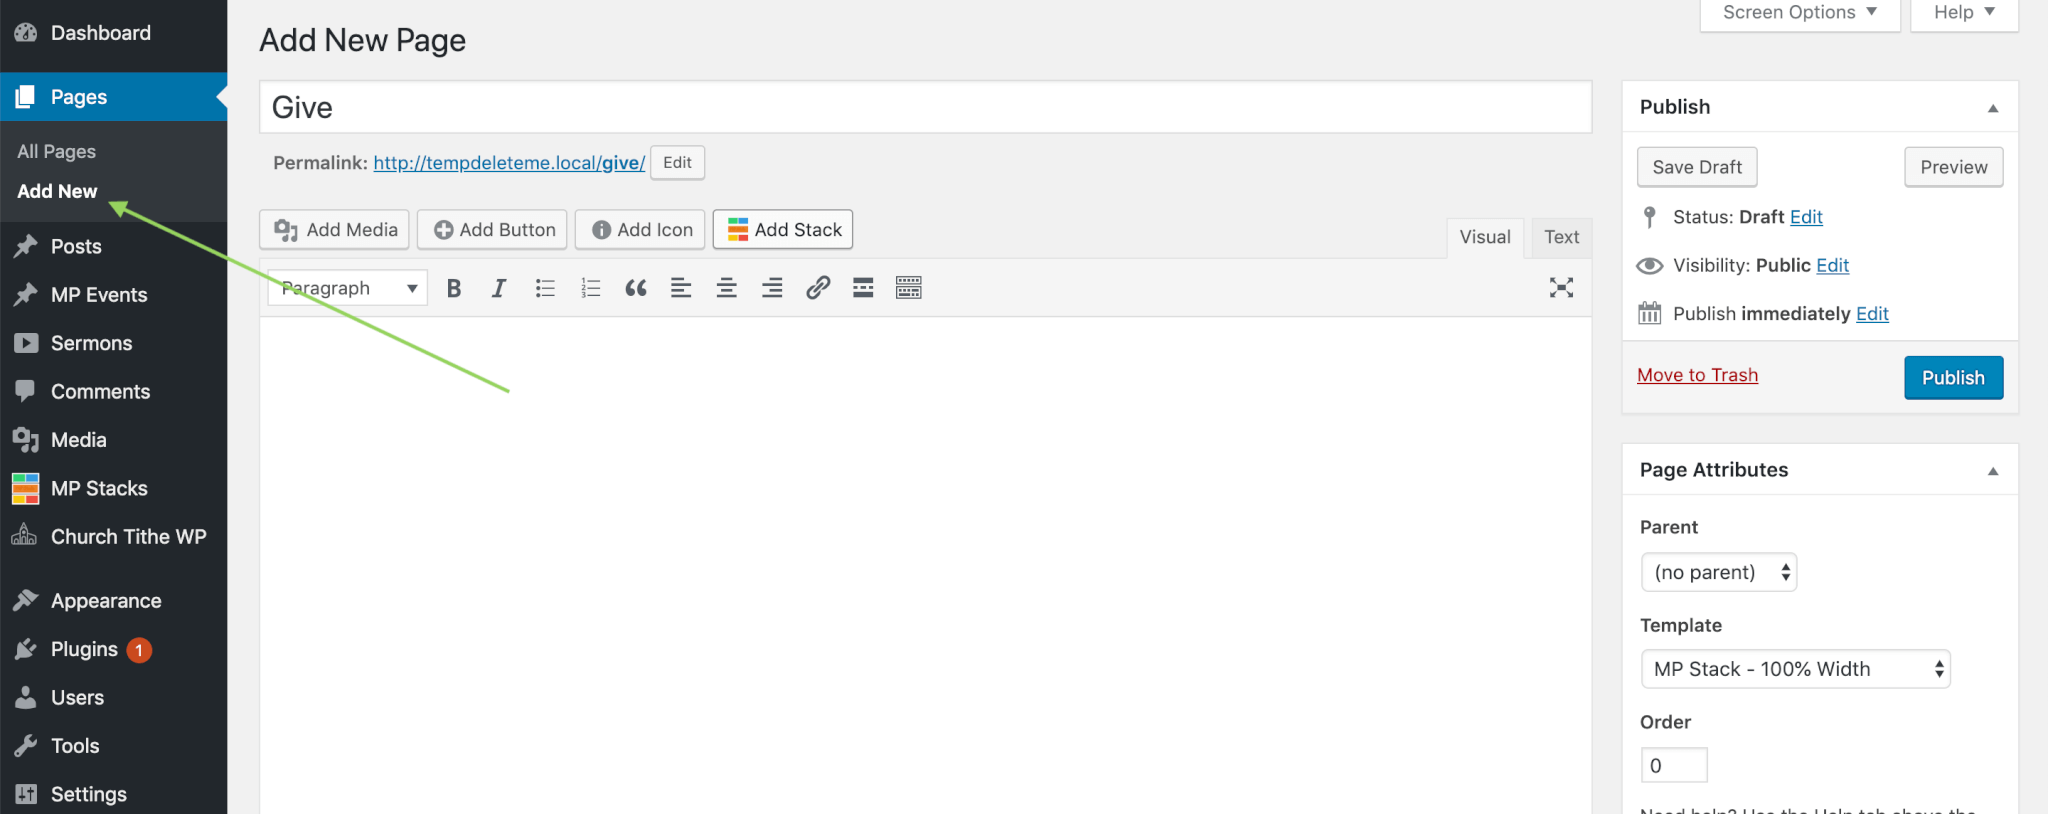
- Call the page something like “Give” or “Give Online”, whatever works for your website.
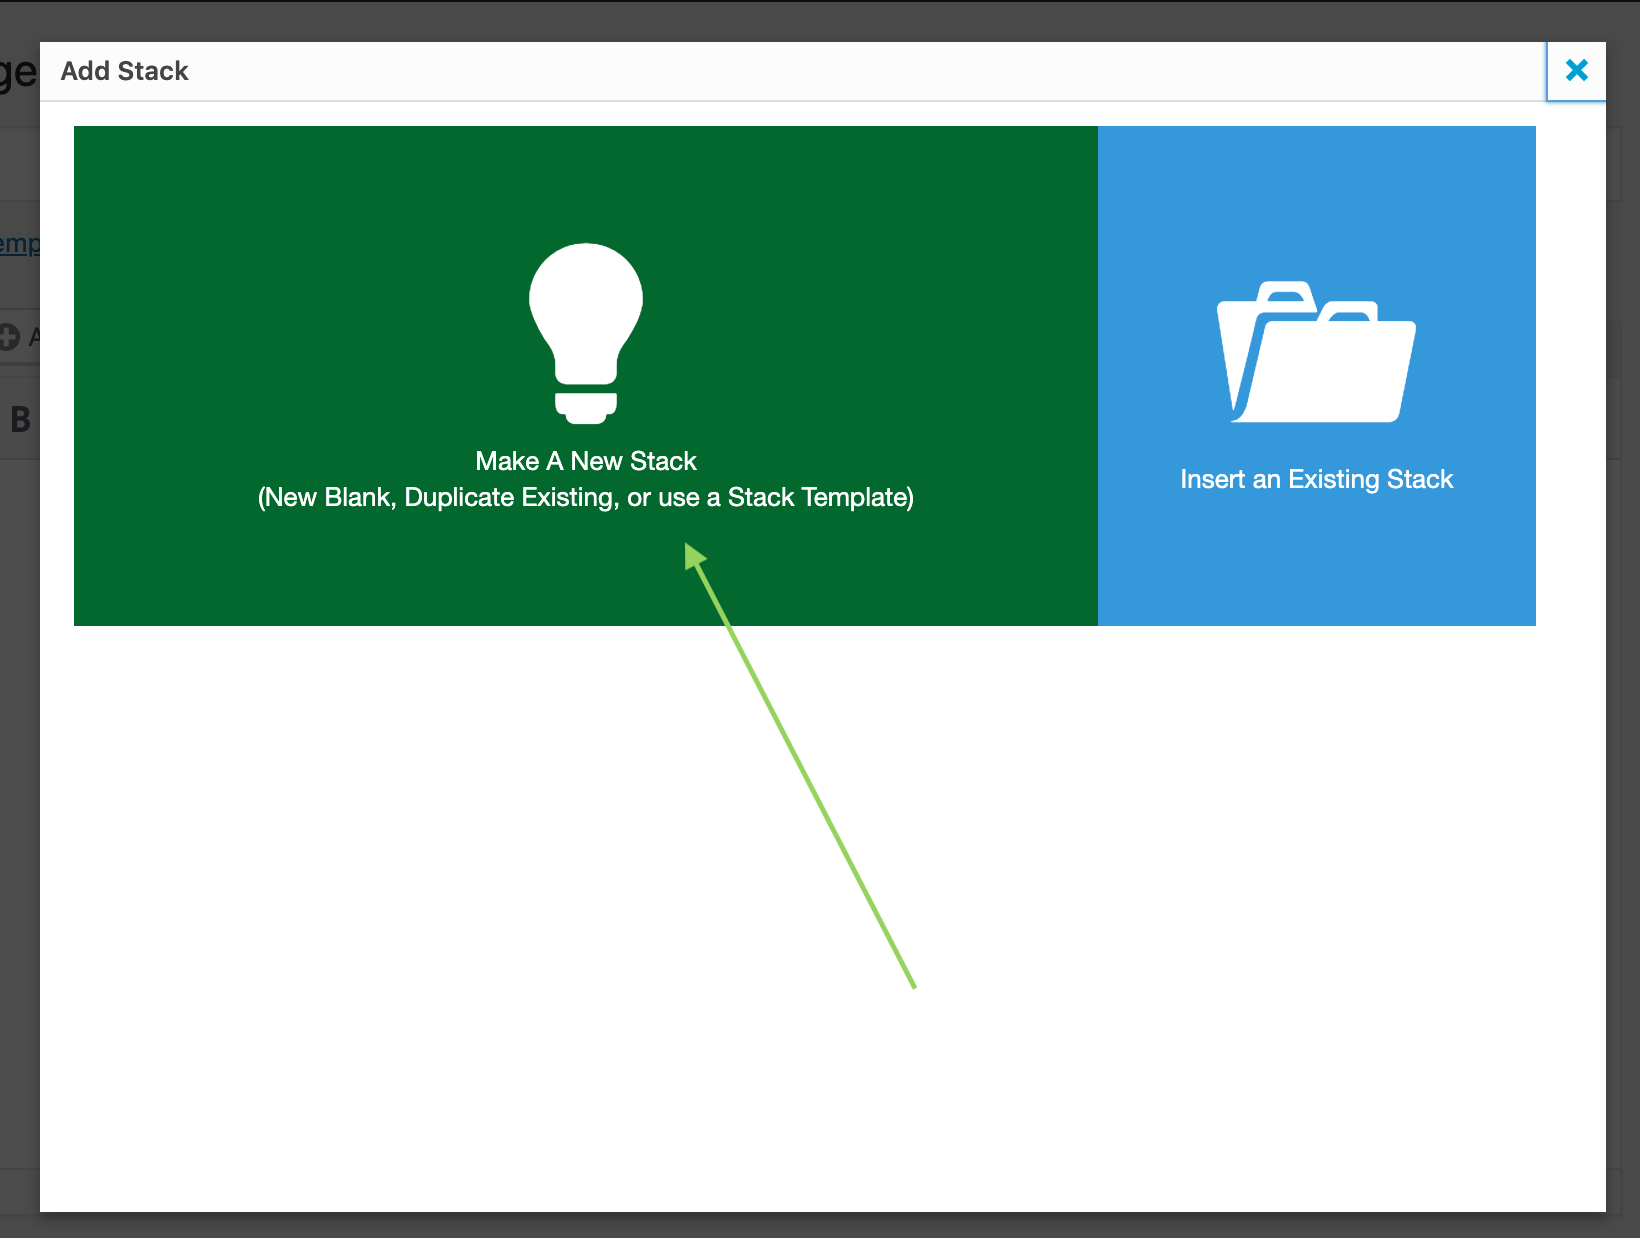
- Click on “Add Stack” > “Make a new Stack”.
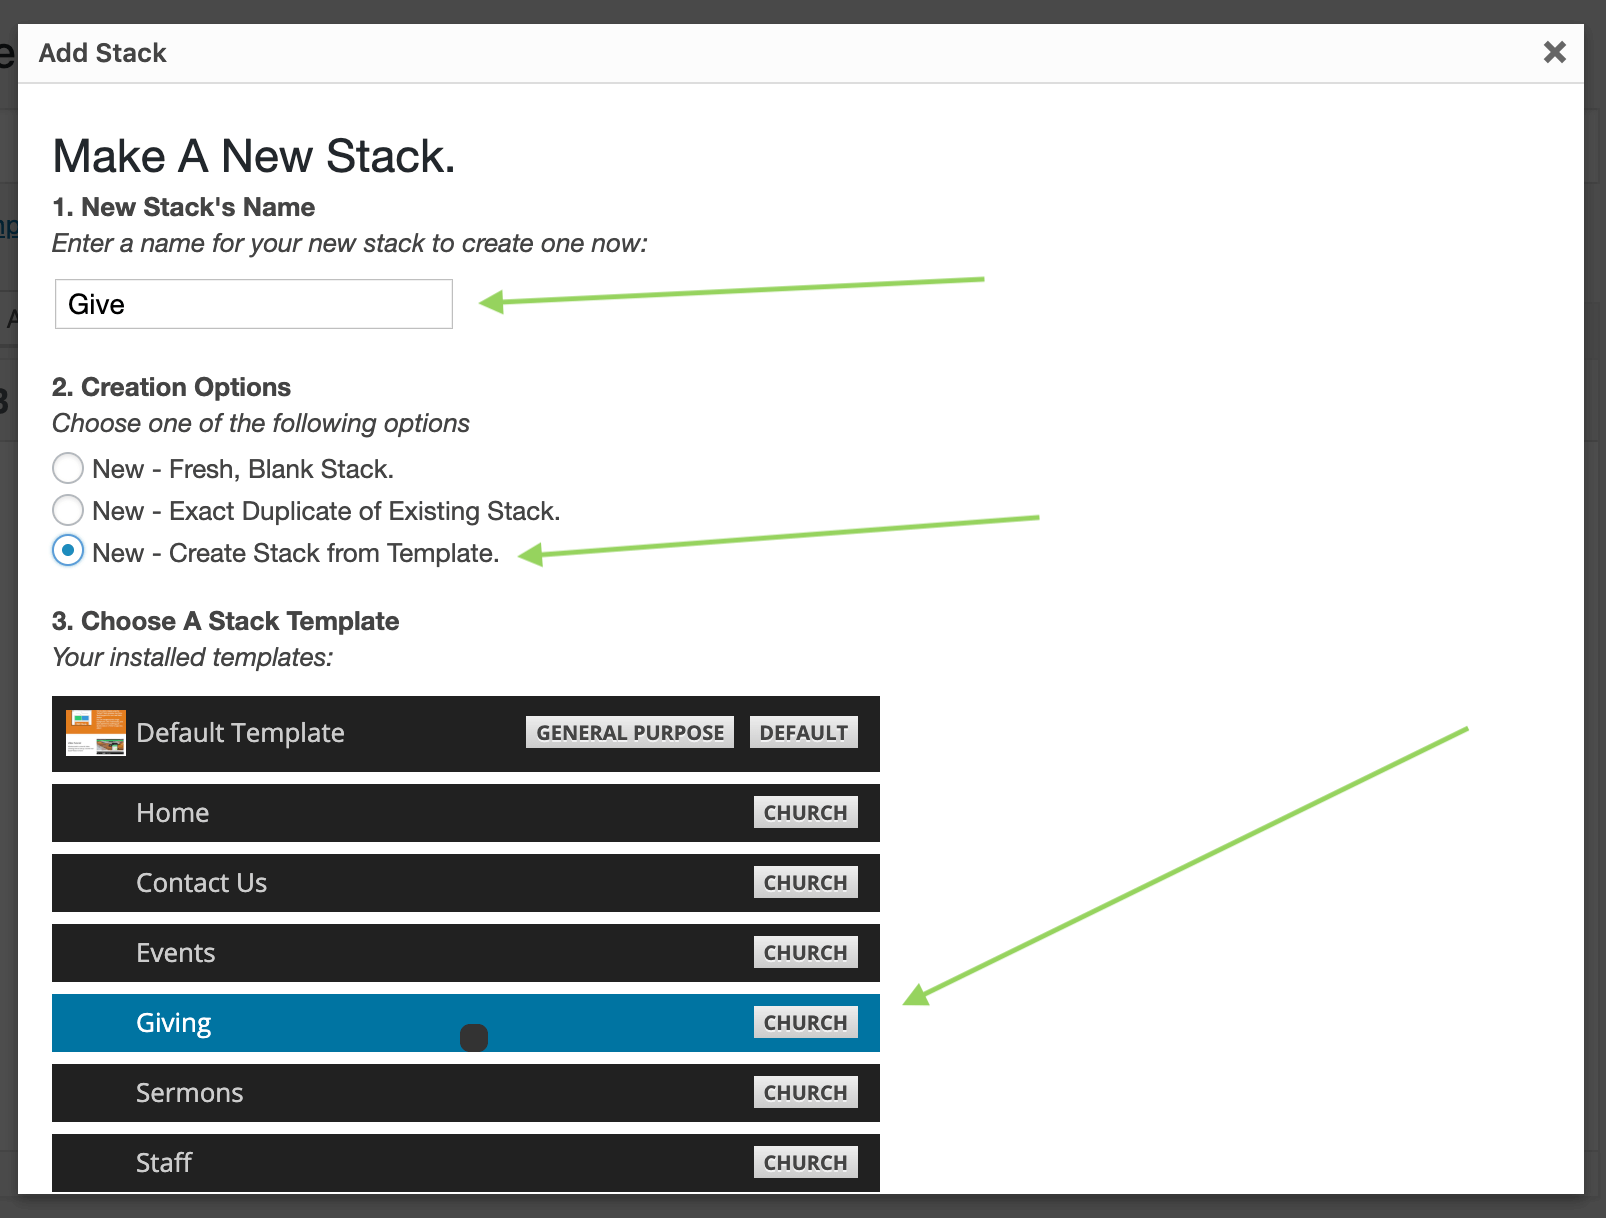
- Give the Stack a name like “Give” or “Give Online” to match the page it will be sitting on.
- Under “Creation Options”, choose “New – Create Stack from Template”.
- Under “Choose A Stack Template”, choose the template called “Giving”.
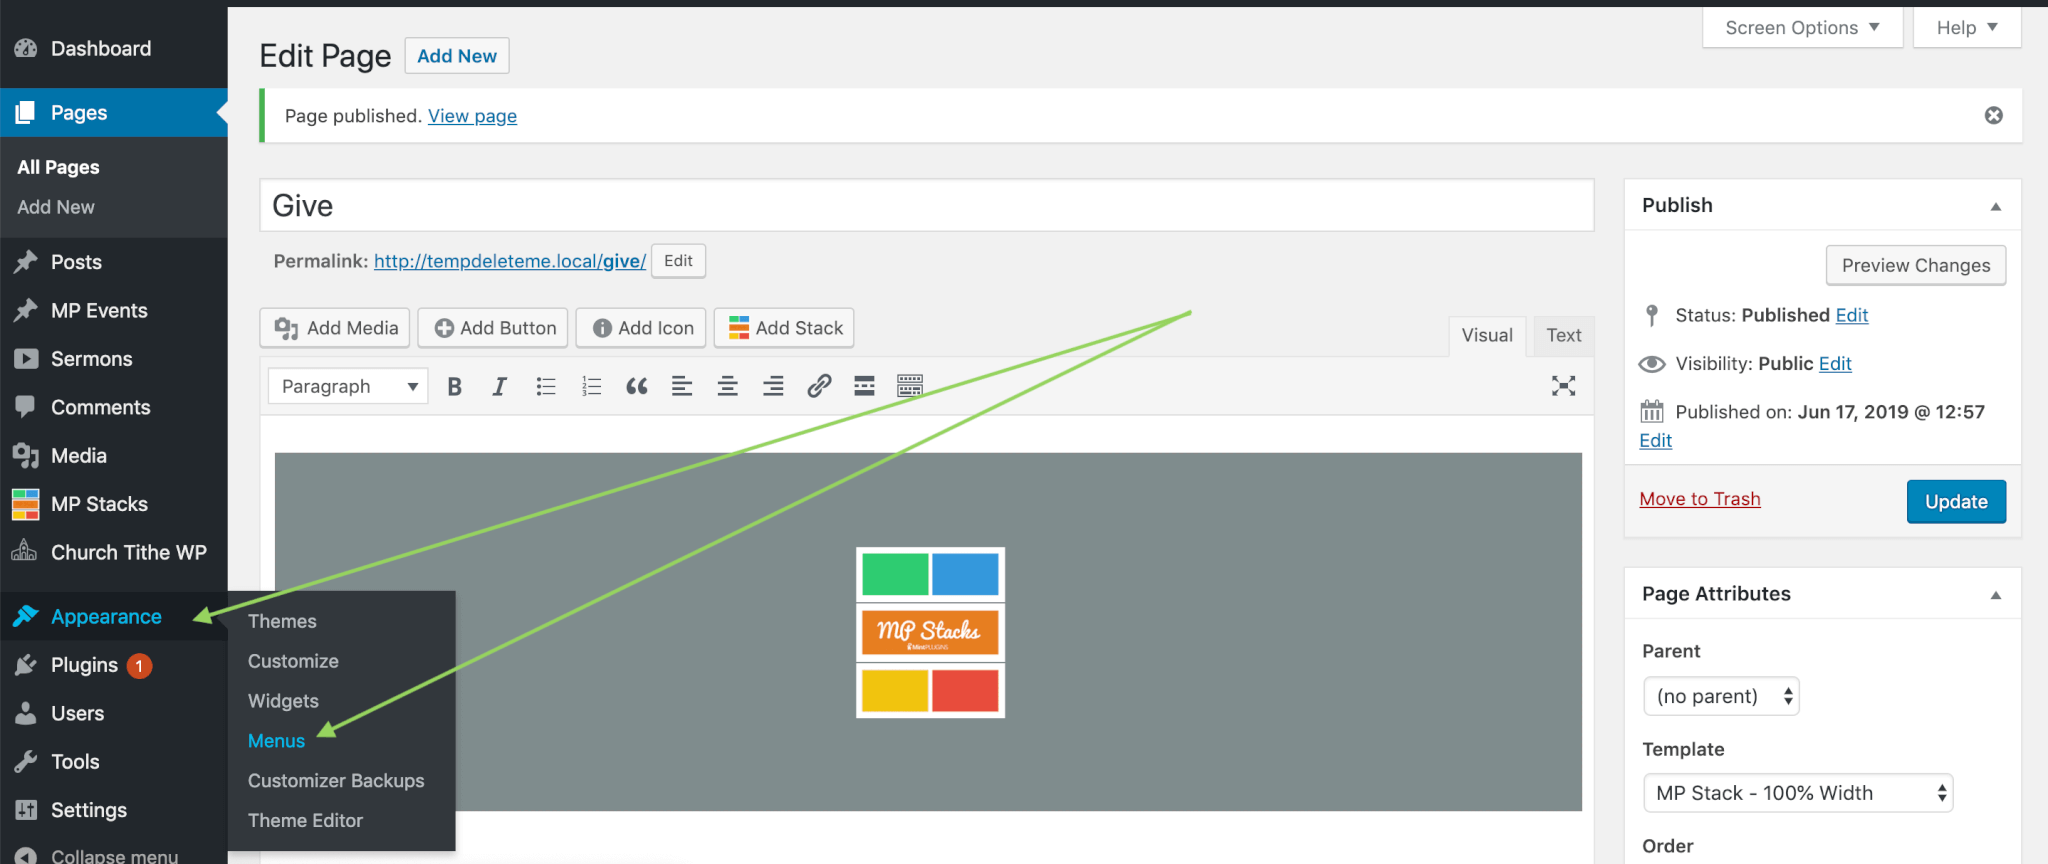
- Now that you have the Stack created and sitting on the page, click “Publish”.

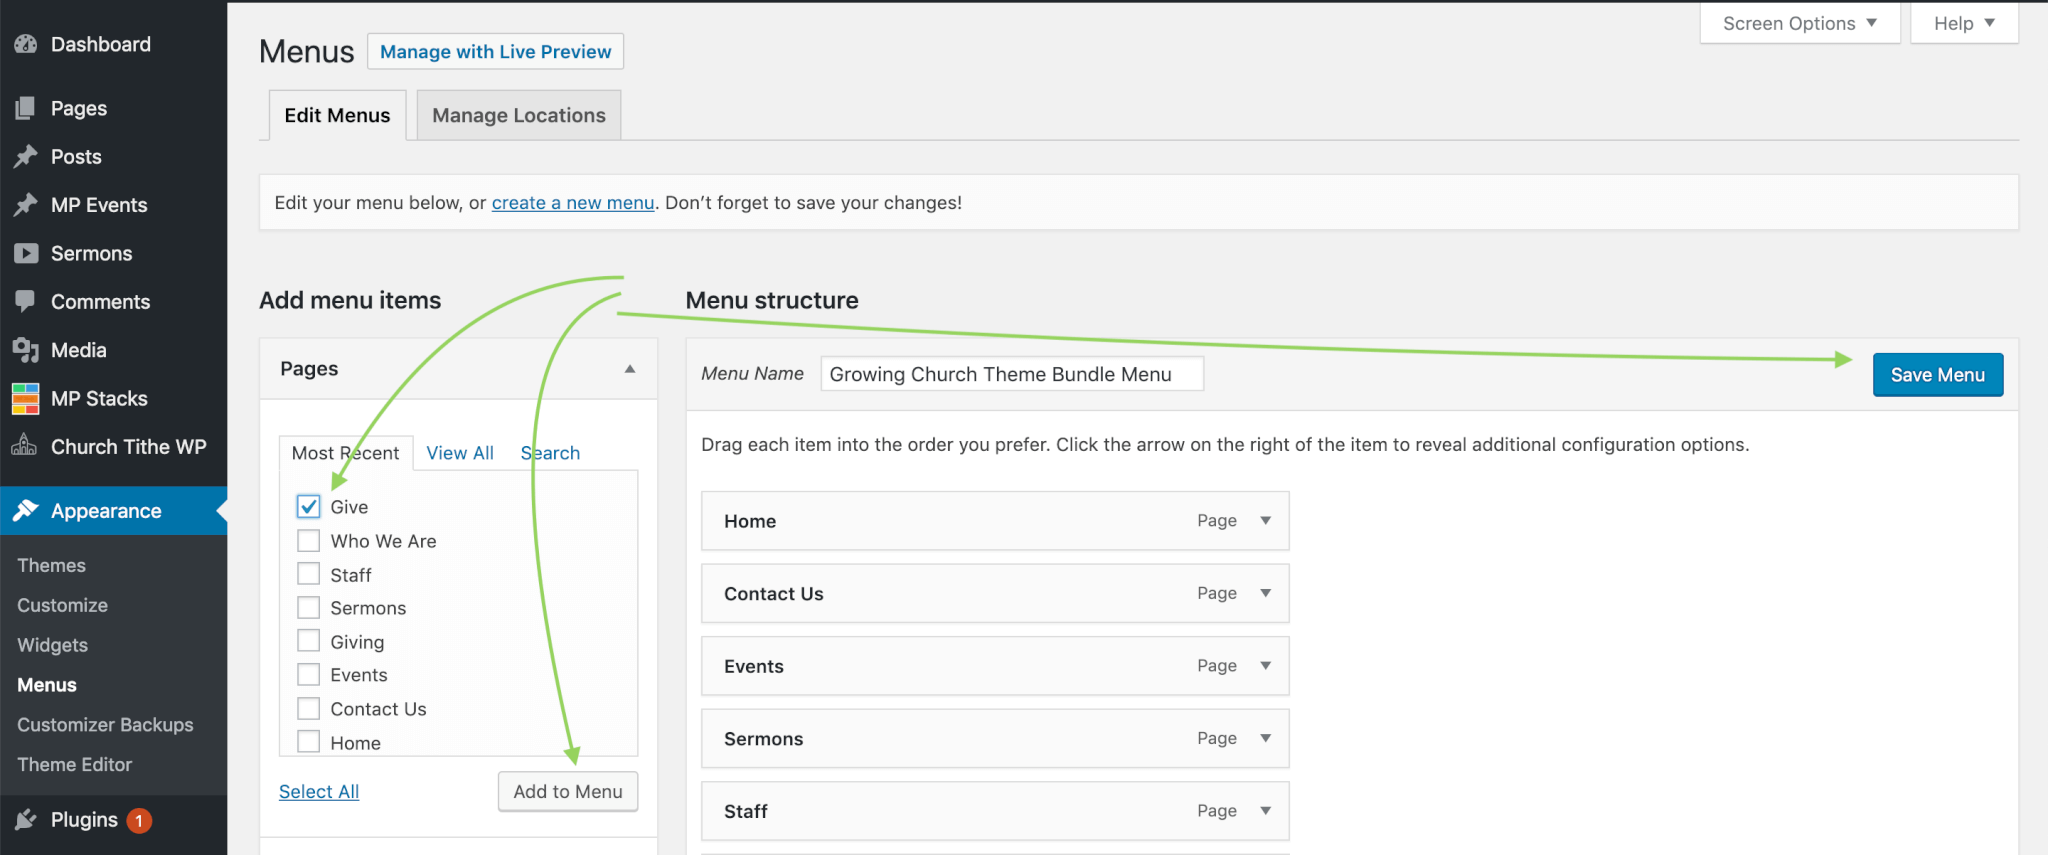
- Great! Now we have a giving page all set up and ready to use. However, we also want to make it easy to find for your users. So now let’s add this new page to the navigation menu. Click on “Appearance” > “Menus”:
- Under the “Pages” metabox, select the page we just created called “Give”. Then click “Add To Menu”, and finally “Save Menu”.
That’s all there is to it! Now, you have a “give” page ready to accept credit card payments, directly on your website through Stripe. If you have any questions about this process, feel free to email us for help: support@mintthemes.com